
10 Ways to Reduce Plastic Injection Molding Costs
Mastering how to reduce injection molding costs is the definitive turning point for any hardware project moving from a 3D printing prototype to mass production. While injection molding is the most cost-efficient method for high volumes, the initial "buy-in" for tooling can be a significant barrier. By focusing on Design for Manufacturing (DFM) and strategic material choices, you can often slash your initial capital expenditure by 30% or more.
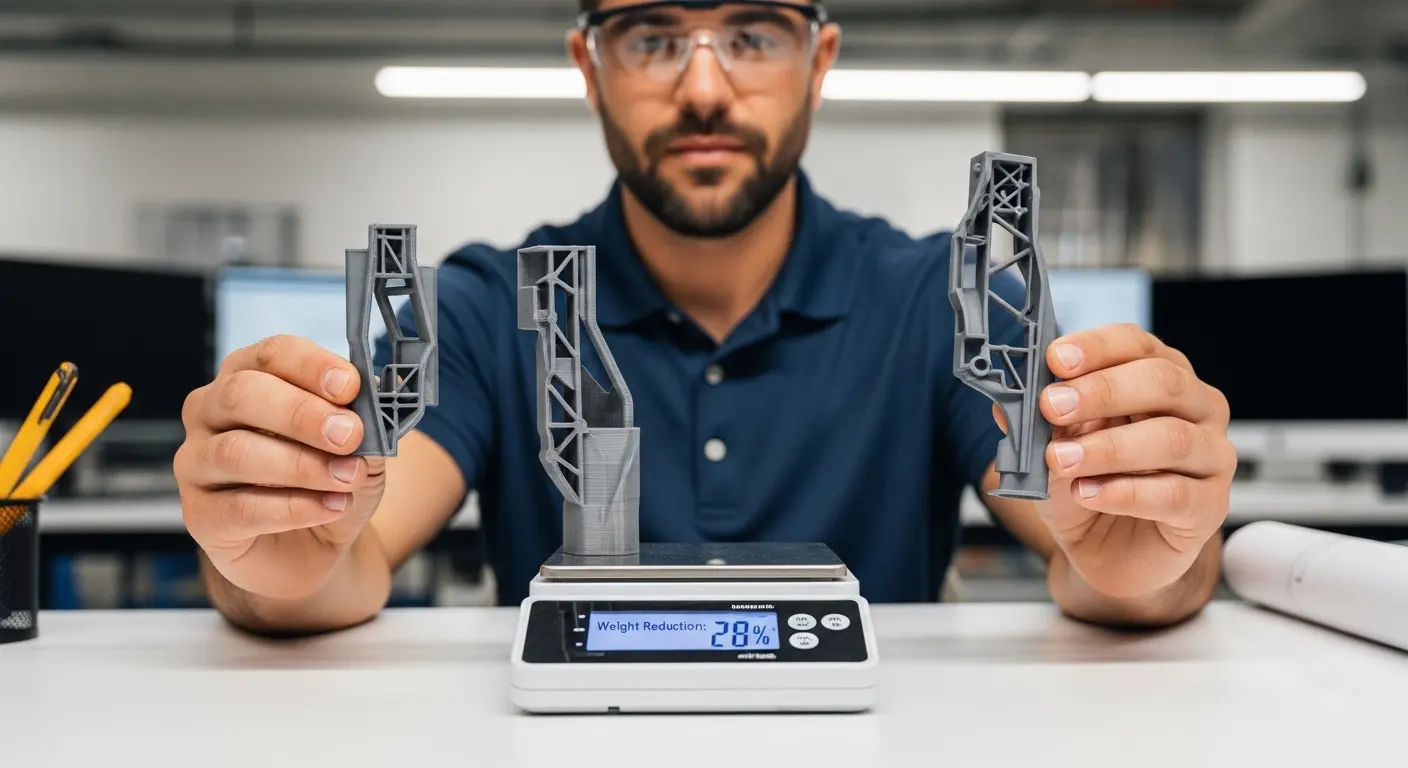
1. Simplify Part Geometry
The more complex a part is, the more expensive the mold. Removing non-functional aesthetic features or complex internal ribs reduces the amount of CNC machining required to create the tool. If a feature doesn't add value to the user, it is likely just adding cost to your bottom line.
2. Maintain Uniform Wall Thickness
Uniform walls are the "holy grail" of molding. They allow for consistent cooling, which prevents warping and sink marks. Thicker sections take exponentially longer to cool; by thinning your walls and using ribs for strength, you can reduce cycle times by up to 50%, directly lowering your per-part price.
3. Incorporate Proper Draft Angles
Draft is the slight taper applied to the sides of a part to help it slide out of the mold. Without a draft angle (typically 1.5 to 2 degrees), the part sticks, leading to a high scrap rate and potential damage to the expensive mold surface.
4. Design Self-Mating Parts
Instead of designing a "top" and a "bottom" that require two separate molds, design a single part that can flip and snap into itself. This "clamshell" approach effectively cuts your tooling costs in half since you only need to pay for one mold base.
5. Eliminate Undercuts
Undercuts are features that prevent a part from being pulled straight out of a mold. They require "slides" or "lifters"—mechanical moving parts within the tool. Avoiding these features keeps the mold design a "straight-pull," which is significantly cheaper to build and maintain.
6. Select Standard Resins
Unless your part is going into an extreme environment, stick to high-volume "commodity" resins like ABS, Polypropylene (PP), or Polyethylene (PE). These materials are easier to process, have shorter lead times, and are significantly cheaper than specialized engineering plastics like PEEK.
7. Use Multi-Cavity Molds for Volume
If you are producing 50,000+ parts, a single-cavity mold is inefficient. A 4-cavity or 8-cavity mold produces multiple parts in every single machine cycle. While the tool costs more upfront, the labor and machine-time cost per part drops drastically.
8. Leverage Family Molds
A "Family Mold" contains different parts of the same assembly (like the front and back of a remote) in one mold base. This is a great way to get multiple unique parts for the price of one tool, provided the parts are similar in size and material.
9. Choose Aluminum for Low Volumes
If you only need a few thousand parts, don't pay for a hardened steel mold. Aluminum tools are much faster to machine and offer superior heat dissipation. This makes them the perfect choice for low-volume injection molding projects.
10. Partner with DFM Experts
The best way to save money is to catch errors before the steel is cut. Partnering with Top 10 Rapid Prototyping Manufacturers allows you to get a professional DFM analysis. They can spot "thin steel" conditions or cooling bottlenecks that would otherwise lead to expensive repairs later.
How Does Simplifying Part Geometry Reduce Costs?
Simplifying part geometry reduces costs by allowing for a less complex mold design, which requires fewer CNC machining hours and less manual benchwork. Eliminating non-functional aesthetic features or complex textures reduces the risk of molding defects and lowers the initial price of the steel or aluminum tool significantly.
I’ve seen many designers treat the mold like a 3D printer, adding complex internal ribs and embossed logos everywhere. In one instance, a client had a textured internal surface that no user would ever see. By removing that texture and smoothing the internal ribs, we cut [data: $4,000] off the tooling quote and reduced the scrap rate by 5%. Complexity in molding isn't free—it carries a lifetime tax on your part price.
Why is Uniform Wall Thickness Critical for Budgeting?
Uniform wall thickness is critical because it ensures consistent cooling throughout the part, preventing sink marks, warping, and internal stresses. Parts with uniform walls can be produced with faster cycle times, which directly lowers the machine shop's hourly rate and reduces the amount of plastic resin required per part.
When you have thick sections, the plastic takes longer to solidify. In the molding world, time is money. A part with a 4mm wall might take 60 seconds to cool, while a 2mm wall takes 20 seconds. If you are running 100,000 parts, that difference in cycle time is the difference between profit and loss.
| Wall Thickness | Typical Cooling Time | Impact on Per-Part Cost |
| 1.0 mm | 10 - 15 Seconds | Very Low |
| 2.0 mm | 20 - 30 Seconds | Standard |
| 4.0 mm | 60+ Seconds | High |
Can Draft Angles Lower Your Production Expenses?
Yes, draft angles lower production expenses by facilitating easy part ejection from the mold, which prevents part deformation and reduces the wear and tear on the tool. Without proper draft (usually 1.5 to 2 degrees), parts can stick to the mold, leading to longer cycle times, higher scrap rates, and frequent mold maintenance.
Tip: If you are using a textured finish, you need even more draft. A "heavy" leather-like texture might require 5 degrees of draft to prevent the part from dragging and scuffing as it leaves the mold.
How do Self-Mating Parts Save on Tooling?
Self-mating parts save on tooling by allowing a single mold to produce both halves of an enclosure, effectively cutting your tooling investment in half. By designing the left and right sides of a product to be identical and interlocking, you eliminate the need for two separate, expensive mold bases.
This is a classic "pro move" in consumer electronics. Instead of paying for two $10,000 molds, you pay for one $12,000 mold that is slightly more complex but produces the entire assembly. This is often a better route than low-volume injection molding with two separate tools.
Why Should You Avoid Undercuts in Mold Design?
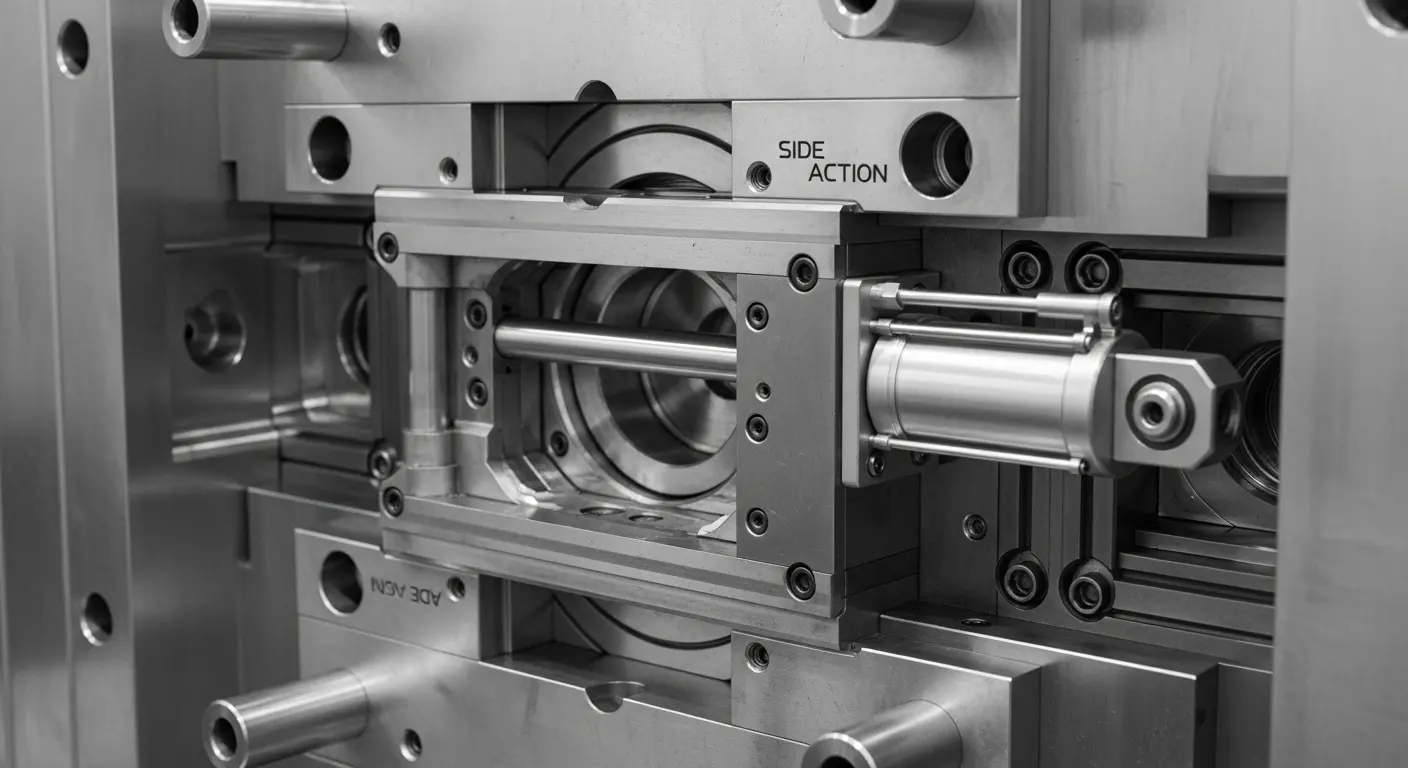
You should avoid undercuts because they require "side-actions," "lifters," or "slides" within the mold to allow the part to eject. these mechanical moving parts significantly increase the complexity of the mold design, add thousands of dollars to the tooling cost, and increase the likelihood of mechanical failure during a production run.
If you can redesign a snap-fit to be a "through-hole" or a simple tab, do it. I once worked with a team that insisted on a side-entry port for a cable. By simply rotating the part orientation and using a "shut-off" in the mold, we eliminated a $3,500 hydraulic slide. Always ask: "Can this feature be achieved with a straight pull?"
How Does Material Selection Influence the Bottom Line?
Material selection influences the bottom line through the raw material cost per pound and the material's impact on cycle time and scrap rates. Choosing a standard, high-volume resin like Polypropylene (PP) or ABS instead of specialized engineering resins like PEEK or ULTEM can reduce material costs by [data: 200-500%].
When comparing molding vs. 3d printing, remember that 3D printing resins are much more expensive than injection molding pellets. However, if you choose a resin that is difficult to process, your machine downtime will eat up any savings you made on the raw plastic.
Are Multi-Cavity Molds Worth the Higher Upfront Cost?
Multi-cavity molds are worth the cost for high-volume runs because they produce multiple parts in a single machine cycle, drastically reducing the labor and machine time per part. While the initial tool is more expensive, the "amortized" cost per part is much lower than using a single-cavity mold for thousands of units.
- Single Cavity: Best for testing and low volumes (< 1,000 parts).
- 2-4 Cavities: Good for medium production.
- 8-16+ Cavities: Essential for mass-market consumer goods.
What is a Family Mold and When Should You Use It?
A family mold is a single mold base that contains cavities for different parts of the same assembly. You should use a family mold when your parts are of similar size, made of the same material, and required in equal quantities, allowing you to produce a complete "kit" of parts in every cycle.
However, be careful. If one part in the "family" is much larger than the others, it will cool at a different rate, potentially causing quality issues for the smaller parts. Expert Top 20 Rapid Prototyping Manufacturers can balance the "runners" in the mold to ensure even pressure and cooling across all parts.
Should You Choose Aluminum or Steel for Your Mold?
You should choose aluminum for low-to-medium volumes (up to 10,000 parts) because it is faster to machine and dissipates heat better, leading to shorter cycle times. You should choose hardened steel for high-volume mass production (100,000+ parts) because it is much more durable and can withstand the abrasive nature of glass-filled plastics.
Aluminum molds are the secret weapon of low-volume injection molding. They can be cut in half the time of steel, getting you into production weeks earlier.
How Does Partnering with the Right Manufacturer Lower Costs?
Partnering with the right manufacturer lowers costs through their expertise in DFM (Design for Manufacturing) and their ability to optimize the production process. A high-quality partner will identify cost-saving opportunities in your design before the tool is even cut, preventing expensive mid-project changes and ensuring the highest possible "first-pass yield."
Working with a firm that understands the entire lifecycle—from 3d printing to mass production—is invaluable. They can guide you on when to switch from one process to another to keep your unit costs at an absolute minimum.
Final Thought
Understanding how to reduce injection molding costs isn't about cutting corners; it's about intelligent engineering. By simplifying your geometry, choosing the right materials, and leveraging the expertise of top-tier manufacturers, you can bring a high-quality product to market at a fraction of the traditional cost. The most expensive part is the one that has to be redesigned after the mold is built. Invest your time in the design phase, and your bottom line will thank you during the production phase.