
The Ultimate Guide to the Custom Silicone Rubber Parts Manufacturing Process
The custom silicone rubber parts manufacturing process is a sophisticated engineering journey that transforms raw polymer into high-performance components used in everything from life-saving medical devices to aerospace engines. In today’s industrial landscape, silicone is favored for its thermal stability, biocompatibility, and extreme durability. However, achieving a perfect part requires more than just high-quality material; it demands a synergy of precise mold design, advanced curing techniques, and rigorous quality control.
At Sunon Mould, we have spent decades refining these processes. Whether you are developing a complex gasket for an electric vehicle or a tactile keypad for a consumer electronic device, understanding the nuances of how these parts are made is the first step toward optimizing your production costs and part performance.
What Is the Custom Silicone Rubber Parts Manufacturing Process?
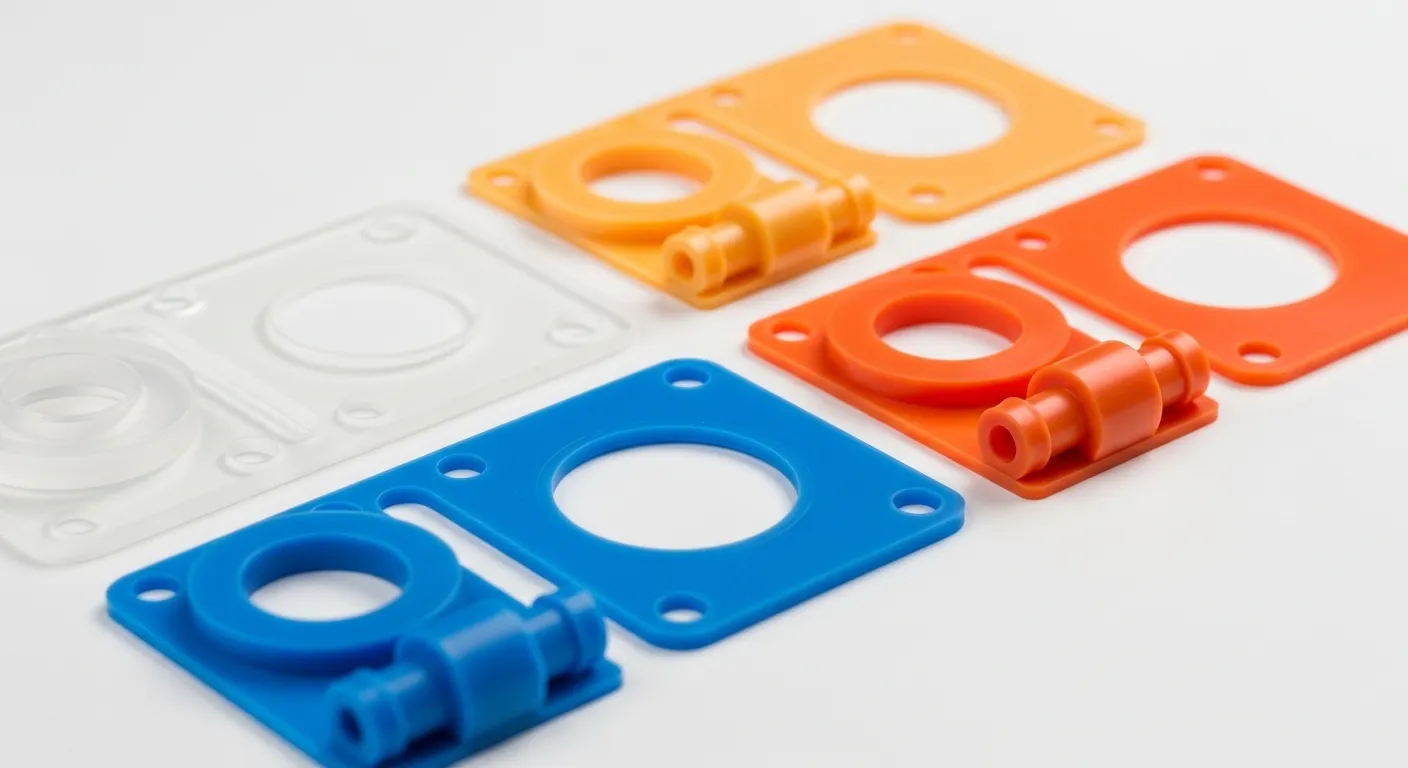
The custom silicone rubber parts manufacturing process is a series of engineering steps including material selection, mold creation, and curing (vulcanization) to produce specific shapes. It involves feeding raw silicone—either as a solid (HCR) or liquid (LSR)—into a precision-machined mold under high heat and pressure to trigger a chemical cross-linking reaction.
While the definition sounds straightforward, the execution is where the "art" of manufacturing meets the "science" of chemistry. Custom manufacturing differs from off-the-shelf production because every variable—from the durometer (hardness) of the silicone to the venting of the mold—is tailored to the specific application of the end-user.
The Core Stages of Production
- Material Preparation: Mixing base silicone with catalysts and pigments.
- Tooling/Mold Design: CNC machining or EDM of steel/aluminum molds.
- Forming: Injection, compression, or transfer molding.
- Curing: The chemical reaction that sets the rubber’s permanent shape.
- Deflashing: Removing excess material (flash) from the edges.
- Post-Curing: Secondary heating to stabilize properties and remove volatiles.
How Do You Choose Between Liquid Silicone Rubber (LSR) and High Consistency Rubber (HCR)?
Choosing between LSR and HCR depends on your part’s complexity, production volume, and required precision. LSR is a pumpable, two-part liquid ideal for high-volume, automated injection molding of complex parts. HCR is a clay-like solid best suited for compression molding, lower volumes, or parts requiring specific mechanical toughness.
| Feature | Liquid Silicone Rubber (LSR) | High Consistency Rubber (HCR) |
| Material Form | Liquid (A+B components) | Solid/Gum-like sheets |
| Common Process | Injection Molding | Compression or Transfer Molding |
| Automation Level | High (Fully automated) | Moderate to Low (Manual loading) |
| Precision | Excellent (Flashless options) | Good (May require manual trimming) |
| Typical Volume | 10,000+ units | 100 to 5,000 units |
When to Use LSR
Liquid Silicone Rubber is the gold standard for the medical and electronics industries. Because it is processed in a closed-loop system, it minimizes the risk of contamination. If you are designing a part with thin walls or intricate undercuts, LSR's low viscosity allows it to flow into the tightest corners of a mold without trapping air.
When to Use HCR
HCR is often the "workhorse" of the industrial sector. It is generally more cost-effective for smaller batches because the tooling costs for compression molding are significantly lower than those for LSR injection molding. If your part needs to be exceptionally "tough" or if you are looking for a specific aesthetic like "marbleized" colors, HCR is the superior choice.
What Are the Steps in Silicone Injection Molding?
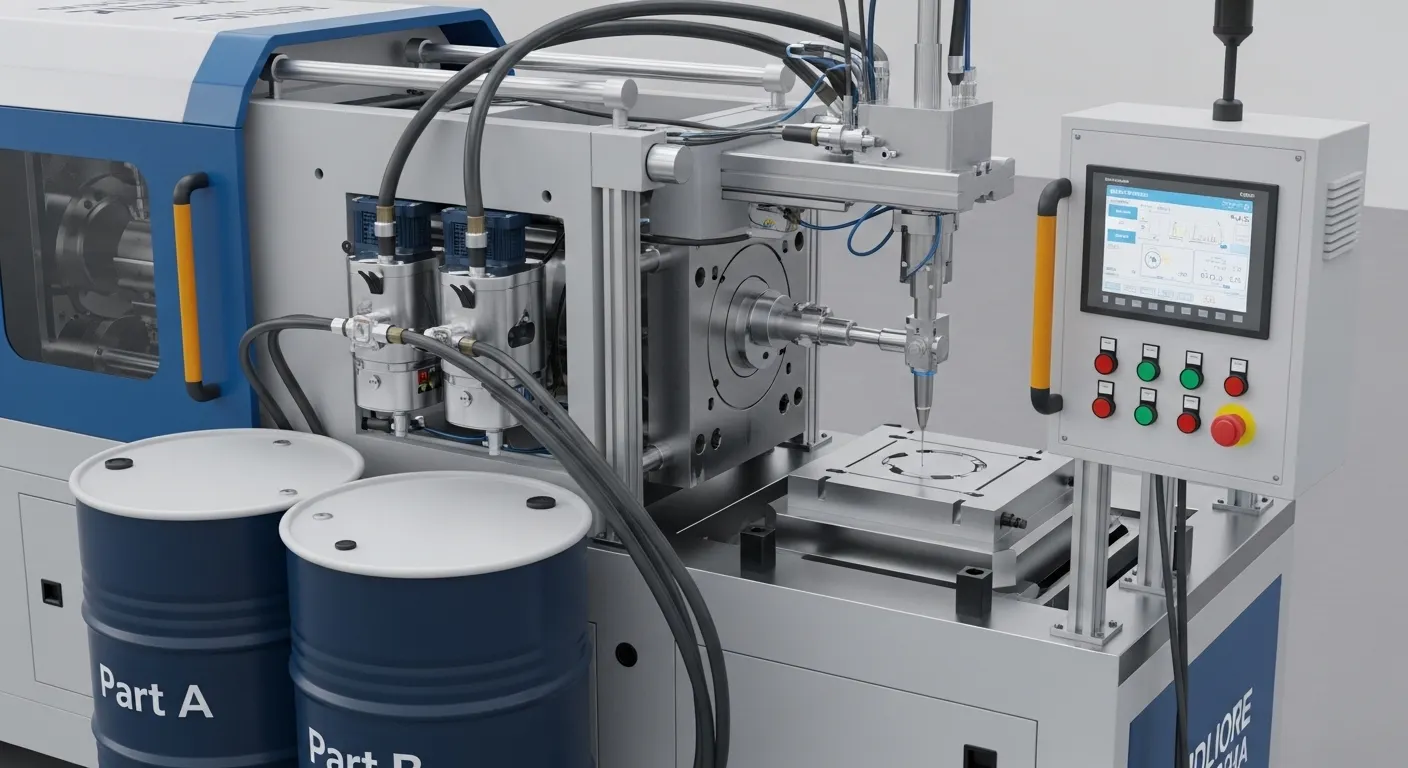
Silicone injection molding involves pumping two-part liquid silicone through a static mixer into a heated mold cavity. The material is kept cold until it reaches the mold, where the high temperature causes it to vulcanize rapidly. This process is highly efficient, repeatable, and yields parts with extremely tight tolerances.
In my experience overseeing thousands of production runs, the "magic" happens in the static mixer. If the ratio of Part A to Part B is off by even a fraction of a percentage, the parts may never fully cure, leading to "mushy" components that fail quality checks.
The Injection Molding Sequence
- Feeding: Part A (Base) and Part B (Catalyst) are pumped from drums at a 1:1 ratio.
- Mixing: A static mixer ensures the two components are perfectly homogenous.
- Injection: The mixed liquid is forced into the mold through a cold runner system.
- Vulcanization: The mold is heated (usually between 170°C and 210°C), turning the liquid into a solid.
- Ejection: The finished part is removed, often via air blasts or robotic arms.
This process is particularly vital for modern tech. For instance, when designing electronics precision zinc alloy parts for connectors, engineers often use silicone gaskets created via injection molding to ensure the housing remains waterproof.
Why Is Compression Molding Preferred for Large Silicone Parts?
Compression molding is preferred for large or simple silicone parts because it uses simpler machinery and less expensive tooling than injection molding. A pre-measured "perform" of silicone is placed directly into an open mold cavity; the mold then closes, applying heat and pressure to force the material into the shape.
While it is slower than injection molding, compression molding is the most economical way to manufacture oversized gaskets, seals, and mats.
Pros and Cons of Compression Molding
- Pros: Lower tooling costs (up to 50% cheaper than injection molds), faster setup times, and the ability to process very high-durometer materials.
- Cons: Higher labor costs due to manual loading, more "flash" (excess material), and longer cycle times.
Tip: If you are prototyping a new design, start with compression molding. It allows you to test the geometry and material properties without committing to the massive capital expenditure of a multi-cavity injection tool.
How Does Mold Design Impact the Final Quality of Silicone Parts?
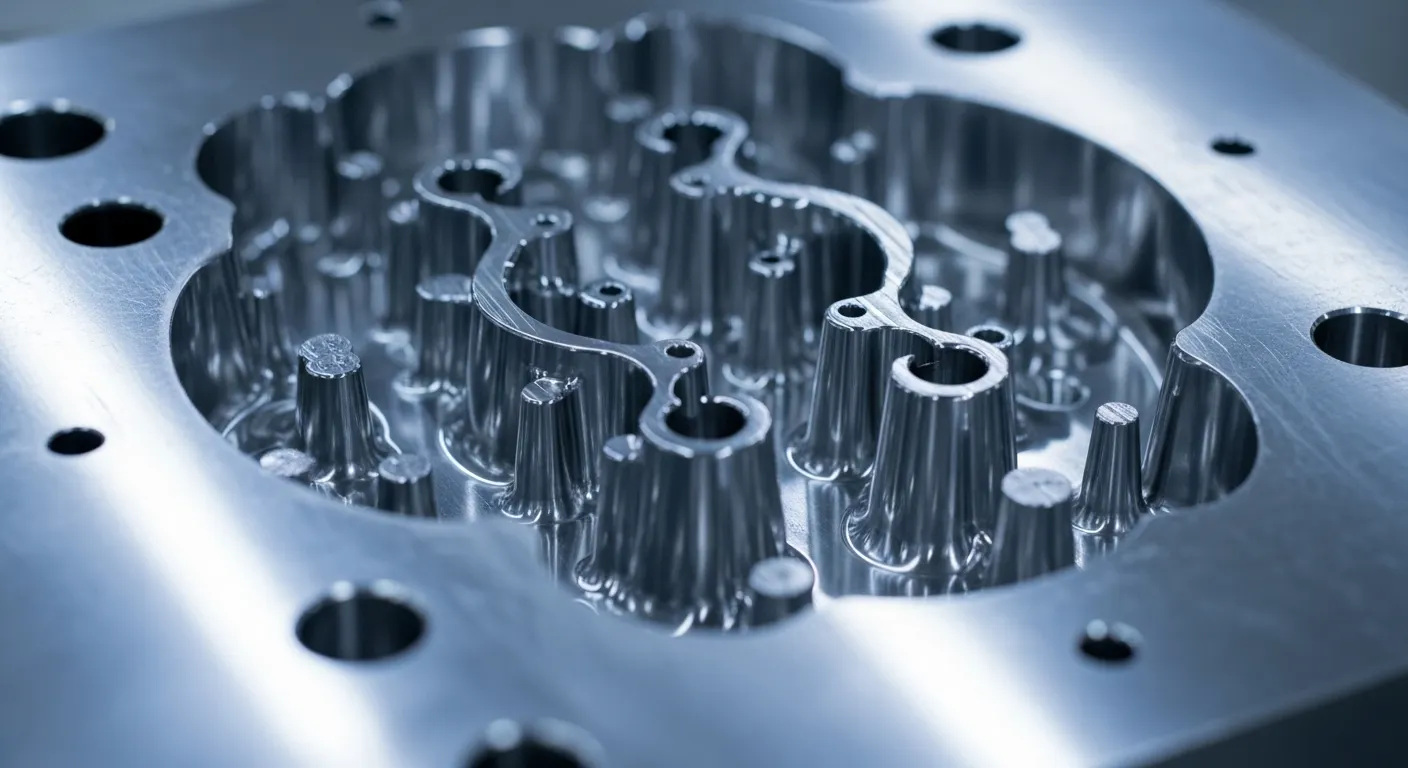
Mold design determines the precision, surface finish, and cost-efficiency of silicone parts. Key factors include shrinkage rates (silicone shrinks 2-4% after cooling), venting to prevent air traps, and gate placement to ensure even flow. A well-designed mold minimizes "flash" and reduces the need for expensive secondary trimming.
Designing for silicone is different than designing for plastics. Silicone behaves like a pressurized liquid; it will find the smallest gap (even 0.005mm) and leak through, creating flash.
Critical Design Considerations
- Draft Angles: Unlike plastics, silicone is flexible and can often be "peeled" out of a mold, allowing for zero or even negative draft angles in some cases.
- Surface Finish: Do you need a "medical-grade" smooth finish or a textured "soft-touch" feel? This must be EDM-machined into the tool.
- Venting: Silicone releases gasses during curing. Without proper venting, you will see "burn marks" or incomplete fills (short shots).
For those also working with metal components, understanding the precision required in silicone molding is very similar to the requirements for medical device zinc die casting, where high-precision tolerances are non-negotiable.
What Is Post-Curing and Is It Always Necessary?
Post-curing is a secondary process where silicone parts are baked in an oven at high temperatures for several hours after being molded. This process drives off volatile organic compounds (VOCs), stabilizes the material's physical properties, and is strictly required for food-grade, medical, and high-pressure applications to ensure safety and performance.
Benefits of Post-Curing
- Compression Set Resistance: Essential for gaskets that must "spring back" after being squeezed.
- De-gassing: Removes residual catalysts that could cause odors or leach into sensitive environments.
- Hardness Stabilization: The final Shore A hardness is often only reached after post-curing.
If your part is a simple industrial bumper, you might skip this to save costs. However, if you are manufacturing for the automotive sector, where durability is key (similar to the advantages of zinc die casting for automotive parts), post-curing is a mandatory step for long-term reliability.
How Can Manufacturers Reduce Costs in Silicone Production?
Manufacturers can reduce costs by optimizing part geometry to allow for multi-cavity molds, choosing the right molding process for the production volume, and minimizing material waste through cold-runner systems. Reducing the number of undercuts and simplifying the "parting line" of the mold can also significantly lower labor costs related to deflashing.
Cost-Saving Checklist
- Consolidate Parts: Can you over-mold the silicone onto a plastic or metal substrate to eliminate assembly steps?
- Optimize Wall Thickness: Uniform walls (2mm to 4mm) prevent uneven curing and warping, reducing scrap rates.
- Right-Size the Tooling: Don’t buy a 32-cavity tool if you only need 5,000 parts a year.
- Material Selection: Use standard "off-the-shelf" silicone grades unless your application strictly requires specialized fluorosilicone or high-temp variants.
Common Challenges in Custom Silicone Manufacturing (and How to Fix Them)
| Problem | Likely Cause | Professional Solution |
| Air Bubbles | Poor venting or low injection pressure | Increase injection speed; add vacuum-assisted venting. |
| Tacky Surface | Under-curing or inhibited catalyst | Increase mold temperature or cycle time; check for contaminants. |
| Knit Lines | Material cooling too fast before meeting | Relocate gates or increase mold temperature. |
| Excessive Flash | Worn mold or excessive pressure | Refurbish mold surfaces; optimize clamping force. |
One common mistake I see is "catalyst inhibition." If silicone comes into contact with sulfur, latex, or certain adhesives, it will simply refuse to cure. This is why a clean-room environment is often necessary for high-spec manufacturing.
Conclusion: Partnering for Success
The custom silicone rubber parts manufacturing process is a balance of chemistry, mechanical engineering, and meticulous attention to detail. By selecting the right process—whether it’s the high-speed automation of LSR or the cost-effective robustness of HCR—and focusing on "Design for Manufacturability," you can create products that lead the market.
At Sunon Mould, we don't just "make parts"; we solve engineering challenges. If you are struggling to decide on a material or process, consider how your material choice complements your entire assembly. For instance, knowing how to choose between zinc and aluminum die casting for your housing can influence the type of silicone seal you need to ensure a perfect IP67 rating.
Summary Table: Manufacturing Process Overview
| Step | Goal | Key Metric |
| Design | Optimize for flow | Draft angles & Wall thickness |
| Tooling | Precision cavity creation | HRC Hardness of Steel |
| Molding | Form the part | Cycle Time & Temperature |
| Finishing | Remove flash | Aesthetic Quality |
| Inspection | Ensure compliance | Tolerance (±0.05mm) |
Ready to start your next project? Contact the experts at Sunon Mould to turn your CAD designs into high-performance silicone reality.